A DnD room has the ability to set a scene before the dice are rolled and add atmosphere.
While a whole room may seen daunting at first, this painted stone walls dining room was transformed with clever use of ‘plaster’ to give the feel while still being practical for one person to complete. Plus there’s the added bonus that the room doesnt shrink through foam board, and it can be renovated easily back to a flat surface.
Using only 5 paint colours to create the entire look this project was low cost and took about a week (6hrs approximately/day) to complete. A little elbow grease is required to prep the bricks with filler to add definition but the rest is completely paint and applied with paintbrushes and artificial sea sponge.
I also created wood beam lanterns over the DnD table to complete the look and the instructions for that can be found here!
Getting Started
Items Used:
‘One Strike Filler’ from Everbuild.
(this has the consistency of marshmallow fluff and very easy to stipple and mould into shape compared to regular powder based filler I used on half the bricks.)
5 x 1 litre paint: light, medium and dark grey; yellow ochre and a light yellow toned beige/cream.
3 x artificial sea sponges.
Blackboard chalk
1″ decorating paintbrush
1 cm craft/artist paintbrush
(like miniature painting or general artistic paintbrush, it just needs to be flat and about 1cm wide.)

Inspiration and first design
I had been searching around for a wall pattern for a while to decorate the dining room. I had a look through some wallpaper and sticky-back plastic options but they were more of an actual brick pattern rather than a rustic/medieval stone wall design. Turning to the interenet there were tutorials of sorts for creating walls out of foam board which looked great in the ‘done’ photos but I was dubious about the cost of doing an entire room (especially with needing to source the materials in the UK which is more expensive), the problem present by needing to work about radiators, plug sockets and light switches and also the fact that you will actually reduce the size of the room. This ended up being the key factor when desk space is in alcoves and you end up losing at least an inch from every wall.
Hunting some more I found painting tutorials for two different styles of stone patterns. One was a more rectangle style in an overlapping style like you see in modern house wall construction and the other was similar to stone walls in the countryside where long slabs are placed one on top of each other with no mortar. Combining these styles allowed for the mortar wall style to aid in definition of the stones themselves and using the irregular sizes from the countryside wall style to create a bit more interest.
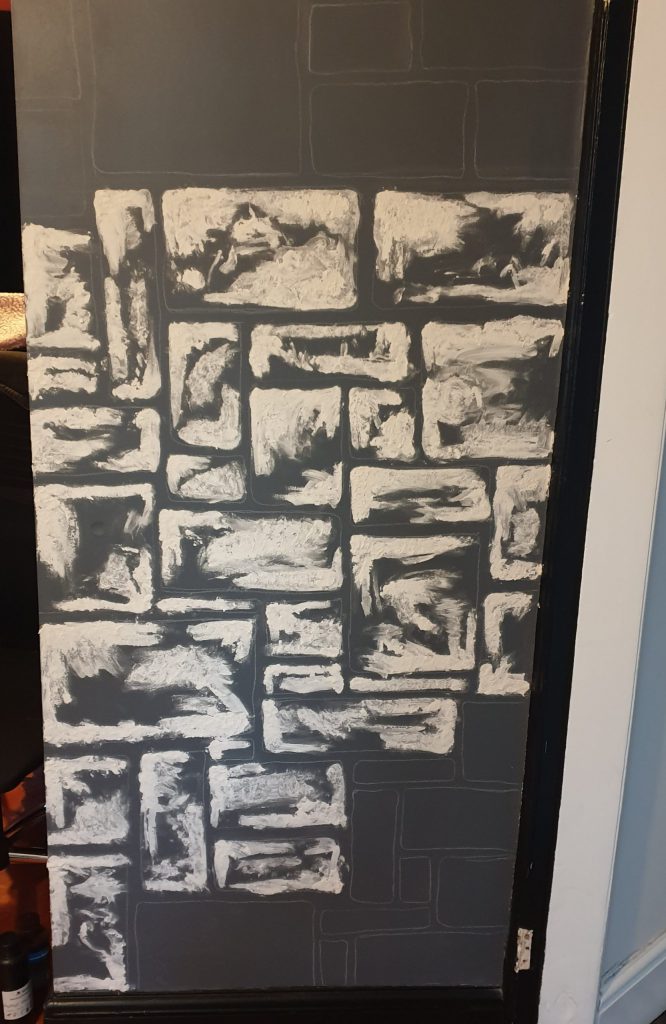
Using what I had looked at as inspiration, I started off using a dressmaking chalk pencil (don’t worry, I switched it out for proper blackboard chalk after this!) I started marking out the stones roughly, rubbing out any bits I wasnt to sure on and making sure I had a selection of large medium and small stones. Working on a section that was fairly seperate from the rest of the walls I could test it out without ‘committing’ too much to the design and method if it didn’t look like it was going to work.
As I wasn’t making the stones out of foam board for a 3D look, I was concerened that just by painting on the surface it was going to look flat. I had seen a ‘brick maker’ for walls that had you putting wall filler into this mould that created a large square of bricks on your wall but again, this seemed like it would reduce the room size by effectively making the walls sit further into the room. So a door frame would be reduced by a couple of cms, the walls around the desks etc… and there was no way it would fit around the radiator without actually removing it first (and I’m not draining out the whole system for that!) so I took the idea to use a wall filler to add texture to the stones without loosing too much space.
Making the stones
Using some left over filler, I wanted the top left and bottom right corners to be slightly raised from the wall and then the middle to have a roughness to it. I got a blob of filler on my finger and then patted it into place before dragging some of the filler away to give that texture.
At this point it was getting harder to see where the stones actually were as there was just filler seemingly everywhere. I also found that this stuff dried out really quickly in the pot and on my hand making it more difficult to get it to actually stick to the wall in question. That as well as there wasn’t much left was a positive thing as I then found the marshmallow fluff type filler which was so much better for what I wanted!
This part took some work as you’ve got to smoosh the filler on the wall, it got easier with the new filler but be prepared to get an arm workout.


I kept going with the new filler and outlined the stones over the archway to the left and marked out the stones on the right hand side wall. You can just see the top of the radiator and there’s a line that seems to cut off the stones. That was my way of getting around difficult areas or just areas in general that either wouldnt be seen or filler on the walls might cause issues.
Impatience also got the better of me and I started painting the bricks in, I used the 1cm craft brush for these so I could control the paint being laid down and ensure that the texture of the filler wasnt lost due to flooding it with paint. This base is with the lightest grey colour I picked.


Details added in
Texturing the stones
Slightly further down there is a great image showing the stones as I was colouring them in and the ‘plaster’ that I settled on to tackle the radiator but this one lets you see the different tones of grey I was working with and how they all layered up.
So I had my three tones of grey; light, mid and dark. Painting the stones light grey gave me the base I needed to add in the details that would be brought forward thanks to the plaster I had already laid down.
I then cut one of the artificial sea sponges in half and from that cut a 2 cm peice to use as my stippling pad for the mid tone grey. This colour was laid down lightly and randomly all over the stone. This gave me some depth to the flat light grey and started bringing out the plaster work that was there.
Cutting out another 2cm peice from the sponge half, I then went into the dark grey and wiped off the excess so it was almost dry and then went in to add the shadows. For this I needed the dark colour to be on the same sides on all the stones to give the illusion of a more 3D effect where the light wasnt hitting them, so I opted for the right hand side and the bottom. As this colour is so dark, I started dabbing it on very lightly and worked slowly to make sure I didn’t deposit too much colour in any one area. Once the sponge was almost out of paint I went back in to the bricks I had done and lightly brushed it along the bottom and right hand side to diffuse the paint that was there and soften it up.
Any areas that were too dark were then gone over with the mid tone again to lighten them and any that seemed a bit too light compared to their neighbours had more of the dark tone added in. As the sponge will run out of paint frequently, it’s tempting to load it up more but resist! You still want some of the base colours to peek through to allow that texture to take centre stage rather than over saturate it and have the colour appear flat.
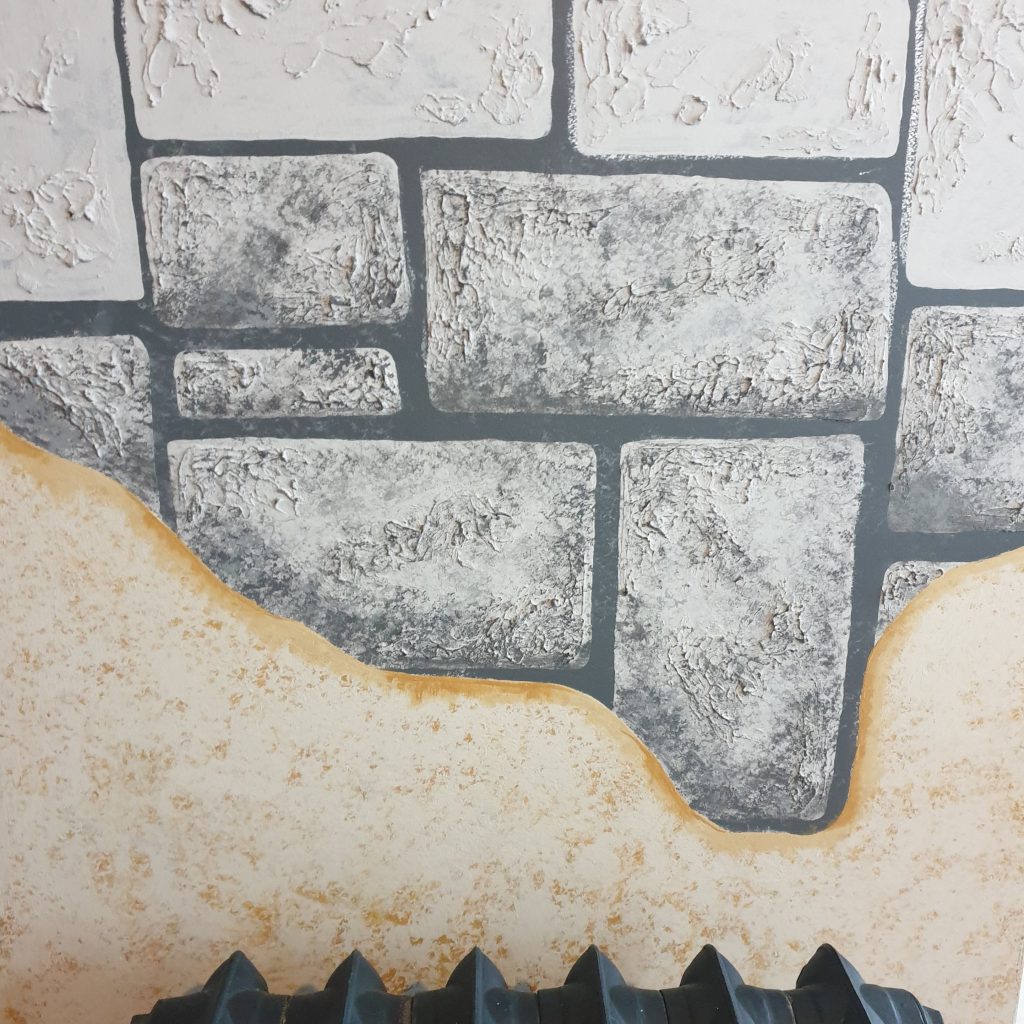
‘Plaster’ for the awkward areas
The radiator presented a problem that I needed to work around, with whatever I chose to tackle it being something that would be easy to apply and fairly convincing that it was ‘part of the design’, so I settled on plaster that was clinging onto the stonework in certian areas.
Using the cream coloured paint, I filled this area in roughly with a 1″ paintbrush. By roughly, I mean that I covered the area but did not fuss over getting it evenly coated. Some bits of the grey were still visible through the brush strokes and that was fine as there were two layers going over the top of it anyway. If however, you have another colour (ie: not black, grey white, cream, brown etc) then you will want this layer to be even so you don’t have any of the ‘un-stone-like’ colour seeping through.
For the detail, I took the artificial sea sponge, cut it in half and dipped the flat side it in the golden tone brown that I had picked out and after wiping off the excess, started dabbing it over the wall to give it a stippled effect. Taking the other half of the sponge I repeated the process with the cream again, to tone down the brown and also make it appear as imperfections imbedded in the plaster.
The edges of the plaster needed to be roughed up a bit to give some depth that it was sitting on top of the stones so going in with the golden brown I used the small artists brush and created shadow areas, dragging the paint away from the edge and fading it into the cream colour. IF you mess up or go in too heavy, you can always gently wipe up the excess (as then some colour will remain) and go in again with the cream colour to tidy up.

Cement and optional wooden rail
As I had gone for a style that had cement gaps in between the stones I had two options, leave it grey or add some colour to it.
Adding colour allowed me to cover up any stippling that went over the stones but my biggest thing was that all that grey looked dull. So I decided on painting it all in, but the cream colour I had seemed too light and too ‘fresh’ rather than adding to the illusion that these were old walls that had been standing for years. With the limited colours that I had I decided on making a colour that was like a dirty cement colour for in between the stones.
For this I took my mid grey as a base, adding in some of the golden brown to add the yellow tones to it. Then adding small amounts of the cream to lighten it until I had an olive colour. I didn’t use the light grey to start with as the mid tone had a stronger hint of blue (hence the adding of the golden brown) and the cream is yellow toned as well so I needed to balance all of those out. But, depending on what colours you have, or what colour you want you can mix up whatever you want, just make sure you have enough of it as there is a lot of cement to paint!
Taking the artist paintbrush I started at the bottom of the wall and worked my way up, making sure to cover as much of the dark grey as I could but still allow some to show through here and there. This takes a long time, youve got to follow the contours of each stone carefully to make sure that you don’t accidentally change their shape and making sure that any errors from painting the stone s themselves are covered up.
I also have a picture rail that I wasnt sure what to do with. Originally I just left it grey and the bit of wall above it but I wasnt happy with how it looked as there was bits of plaster on there and over painting from the stones themselves, so I decided to roughly paint it with the golden brown and then paint the wall above cream as a continuation of the plaster. The final touch was to use a black wash on a bit of artificial sea sponge to gently swipe over the rail irregularly to add a sort of wood grain to it, with the grey coming through to add to the effect. It works pretty well especially when dried but I only did one side as when wet, it looked really dark and I wasn’t sure if I had ruined it!
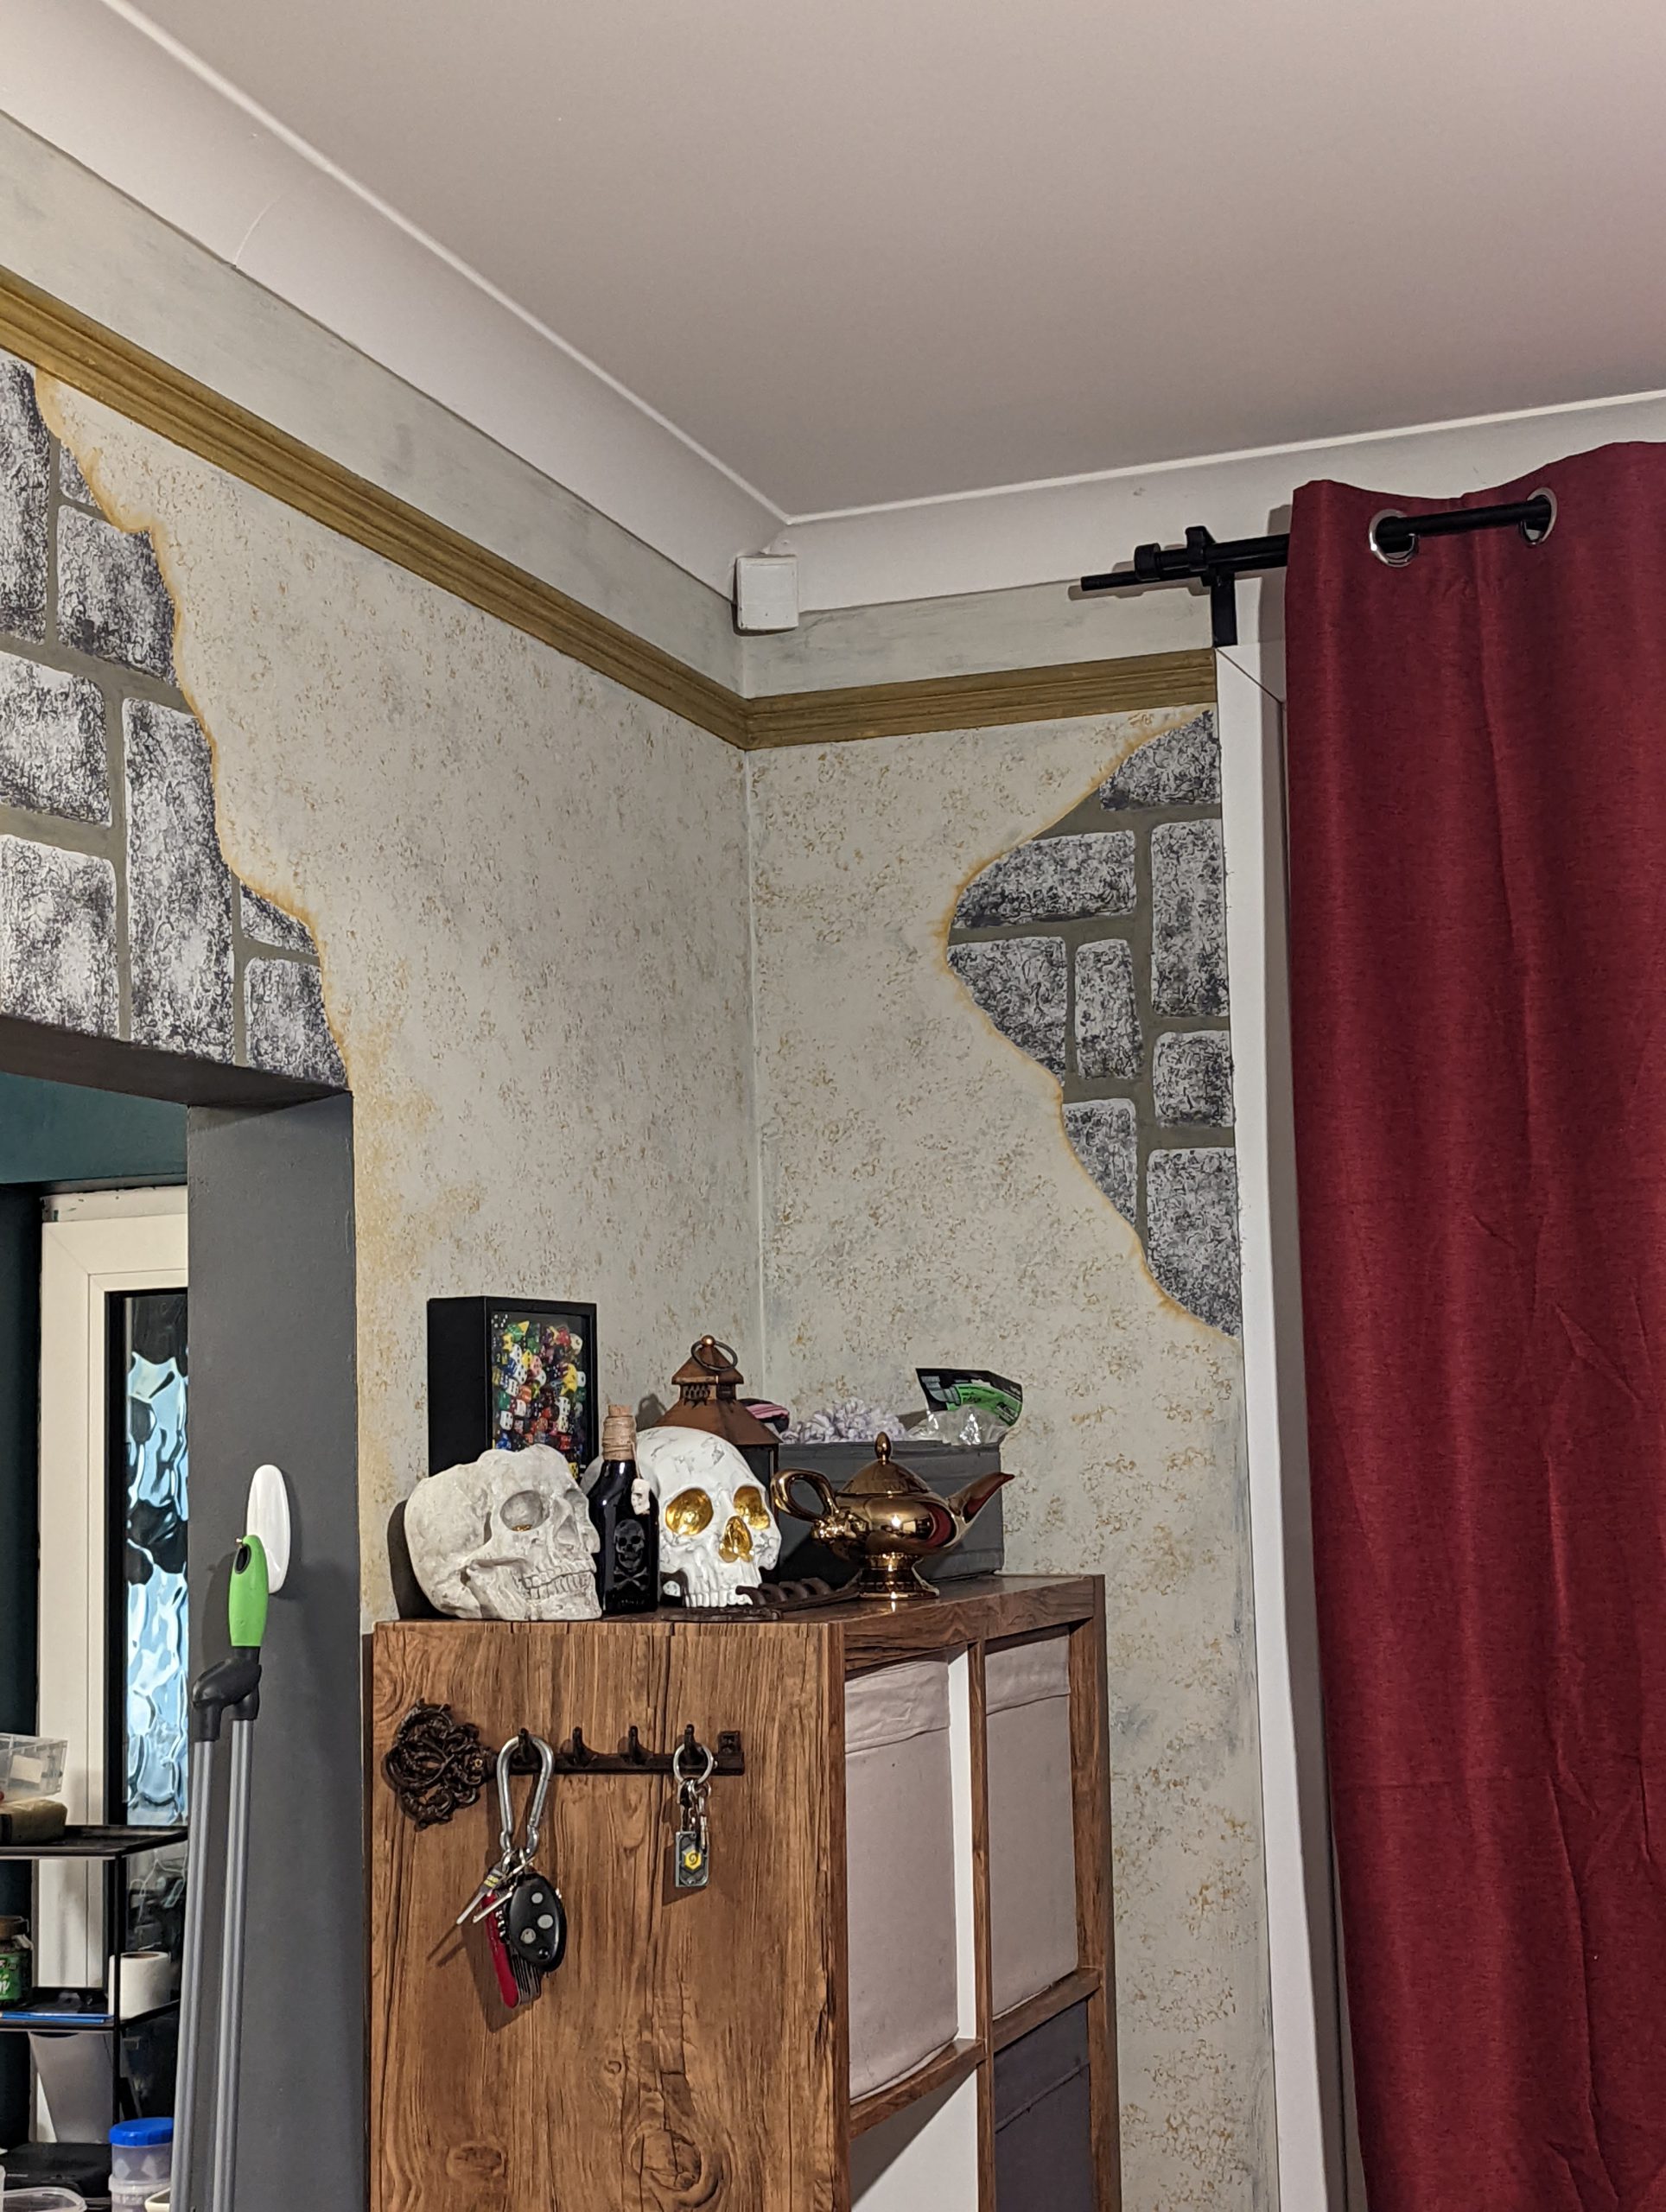
Finished Walls
While the painted stone walls are finished, I still need to go in an paint he ceiling the same cream colour as the white (it’s actually off white as I’ve discovered now that I’ve put the tavern style lighting up and removed the polystyrene ceiling rose that came with the house!) is too ‘clean’ looking. This tavern makeover took about a week but I wasn’t doing it all day every day, so it probably could be done quicker, especially if you alternate between different walls and different components while you wait for bits to dry!